Improving Wi-Fi Coverage for Robot Mowers and Sensors in a Large Garden
Tutorial: Rapid diagnostics and fixes to ensure your robots and sensors stay connected, even on large, hilly terrains.
Improving Wi-Fi Coverage for a Flawless Connected Garden
The equation is simple: no Wi-Fi, no connected garden. Connection losses are the number one source of frustration for owners of modern robot mowers (especially RTK models) and irrigation sensors. A robot that loses the signal is a robot that stops or does not update. This practical guide will help you diagnose the state of your current network and deploy the solution best adapted to the topography of your terrain.
Step 1: The Range Diagnosis
Before buying the slightest equipment, you must establish a precise inventory. Your best diagnostic tool is already in your pocket: your smartphone. Start by downloading a network analysis application (like "WiFi Analyzer" on Android or the AirPort utility on iOS).
The method is simple: connect to your Wi-Fi and walk slowly from your internet router towards the garden. Head towards strategic points: the location of your robot's charging station, the corner of the vegetable garden where your smart valve is located, or the gate. Observe the signal curve (RSSI). As soon as you pass below the -70 dBm bar, the connection becomes unstable. If you reach -80 dBm, it's a sure dead zone. Note these physical limits precisely on a plan.
Technical Solutions: From free to professional
Level 1: Optimizing positioning (Free)
Sometimes, the simplest solution is right before our eyes. Wi-Fi waves travel poorly through dense obstacles like stone, reinforced concrete, or water (and therefore leafy trees). Try moving your internet router. Raising it by a meter or moving it closer to a window overlooking the garden can sometimes be enough to gain the few missing meters of range to reach the robot's station. This is the first test to perform.
Level 2: The Mesh Network
If your house is large or your walls thick, the simple 20€ Wi-Fi repeater is often a false good idea (loss of speed, unstable network). The real modern solution is Mesh Wi-Fi. By installing a satellite box (node) near the bay window overlooking the garden, you create a robust connection bubble that extends outwards. This is the ideal solution for recent houses and medium-sized gardens.
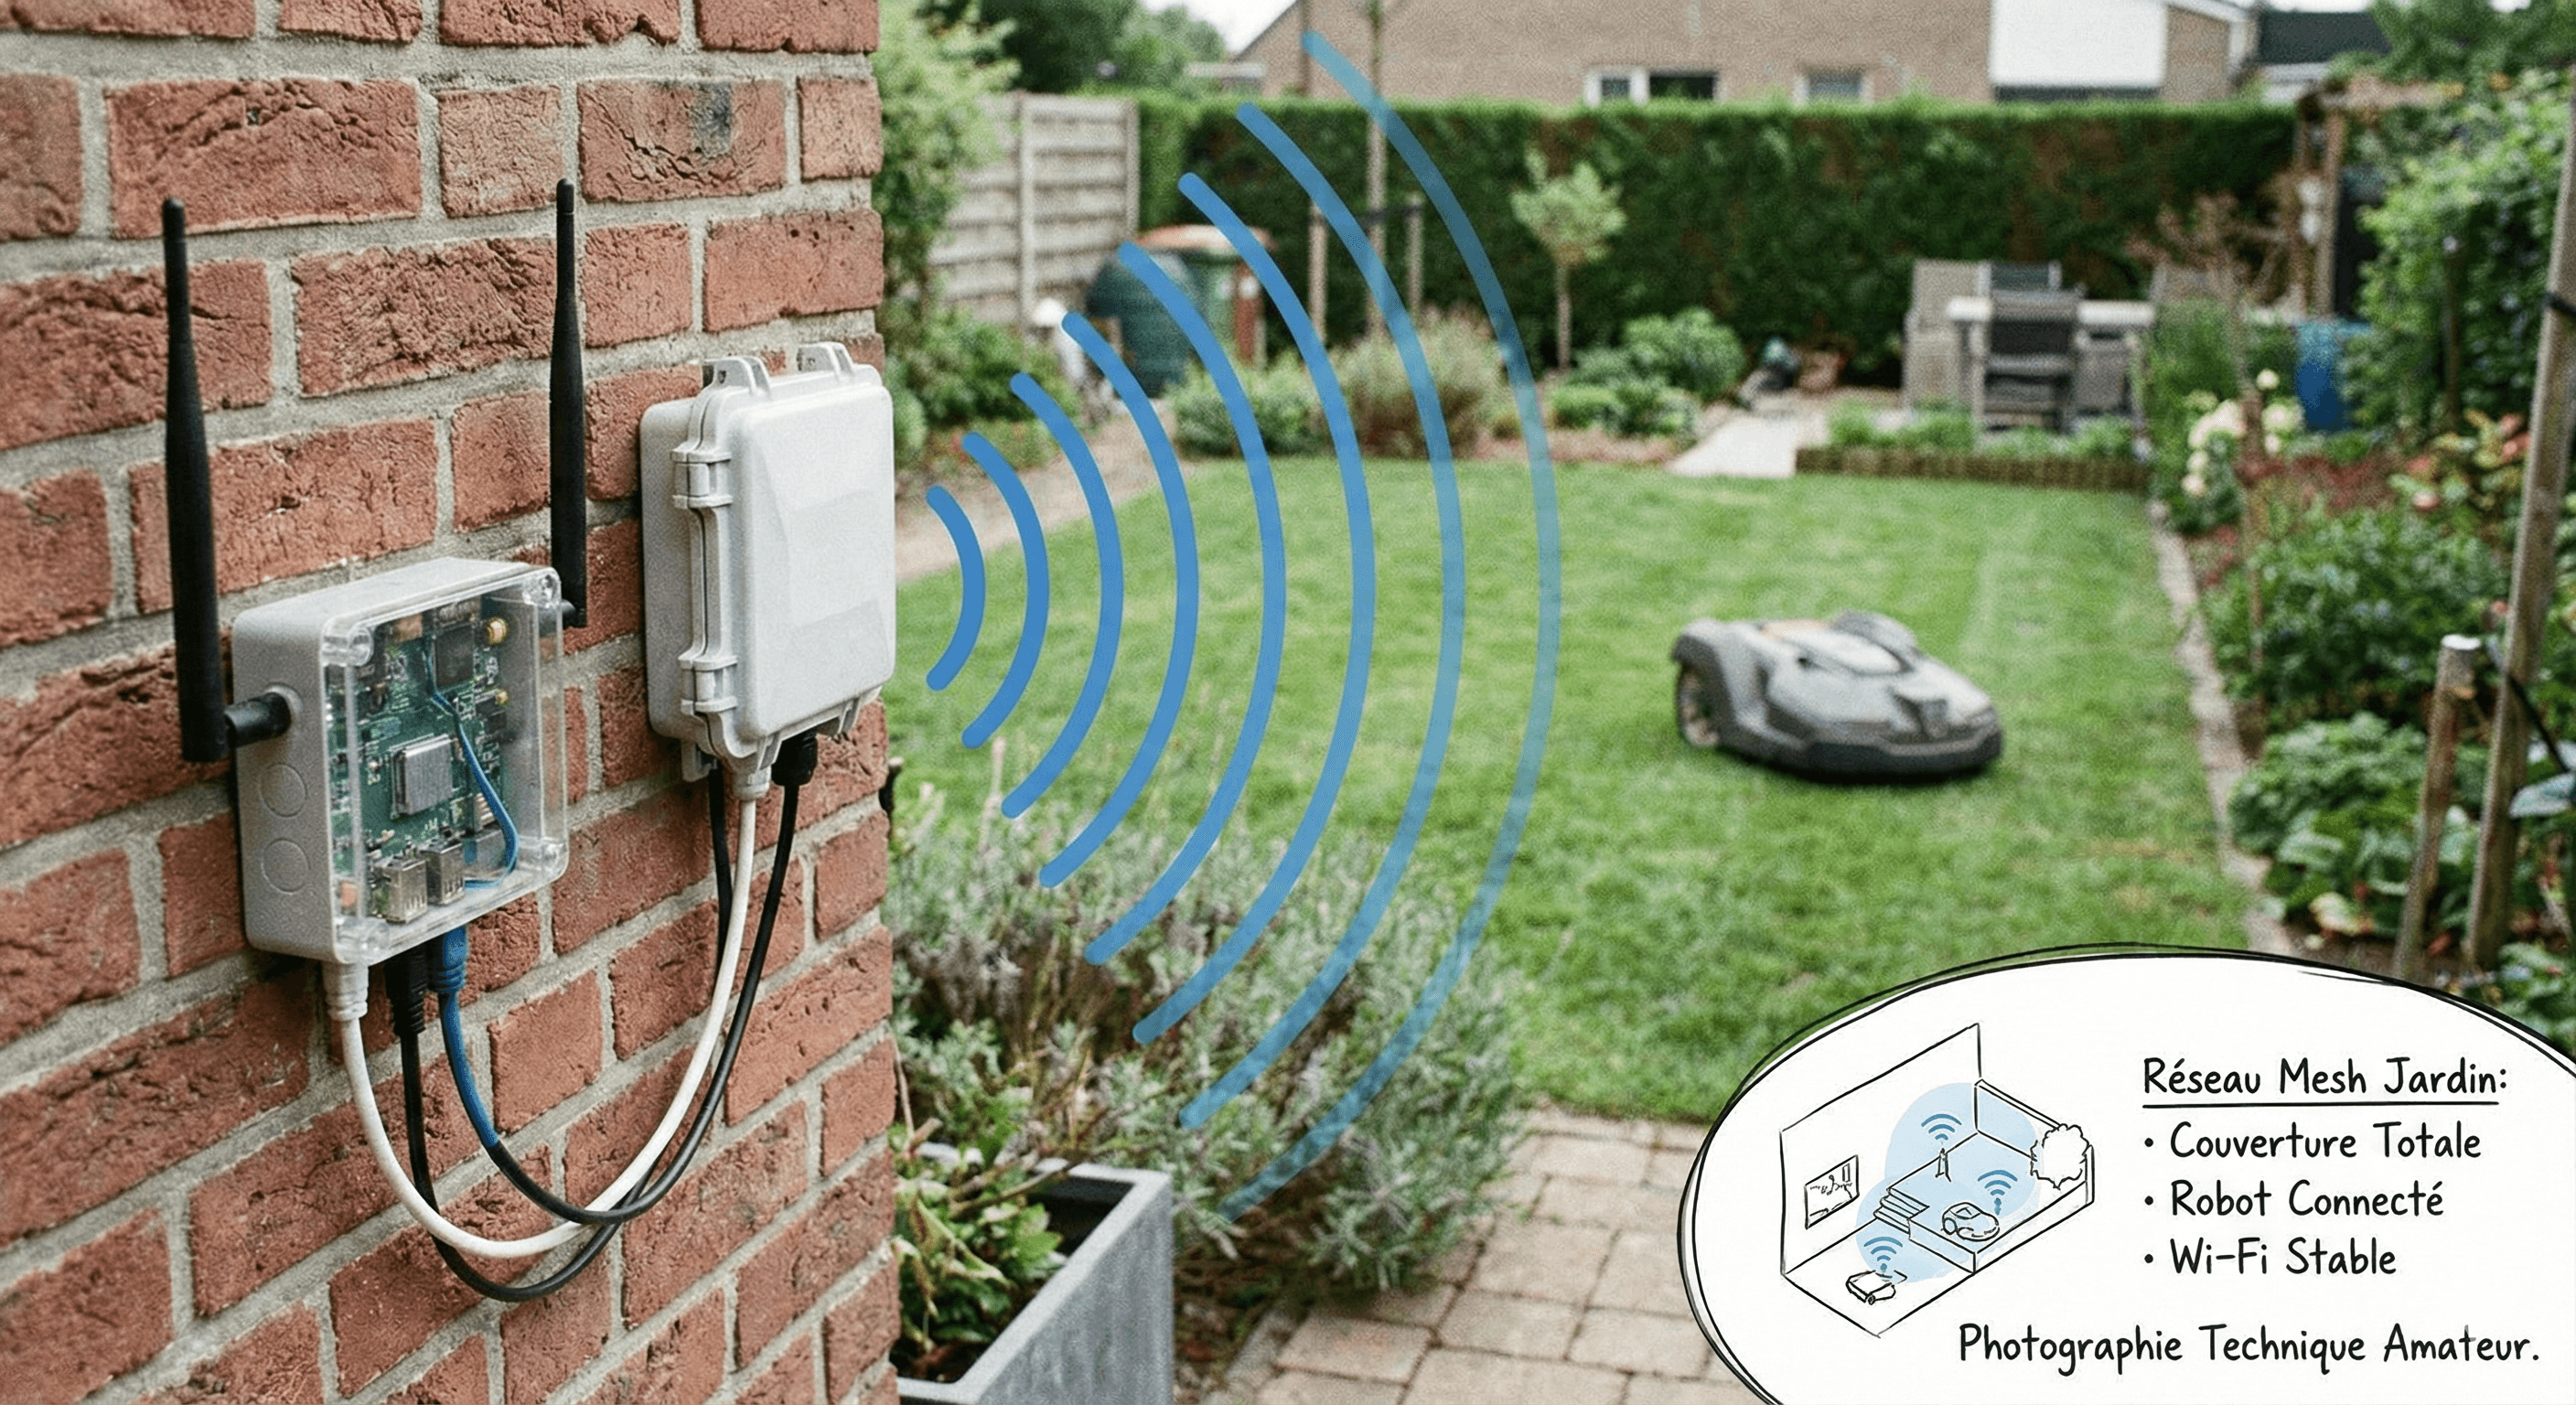
Level 3: The Outdoor Access Point (The ultimate solution)
For large estates or impassable stone walls, there is no secret: you have to take the Wi-Fi outside. The professional solution consists of installing a Wi-Fi access point specifically designed for the outdoors (Outdoor Access Point), resistant to rain and sun. This box, fixed on your exterior facade and linked by an Ethernet cable to your router, will literally water your land with Wi-Fi without any attenuation due to walls. It is the most reliable investment.
Settings: The 5 GHz trap
A classic mistake is to want the "fastest". However, in Wi-Fi, speed and range are opposed. The 5 GHz frequency is very fast but does not carry far and travels poorly through obstacles. The 2.4 GHz frequency is slower but carries much further. Moreover, the vast majority of connected garden objects (robots, watering programmers) operate only on the 2.4 GHz frequency. So make sure your network broadcasts this frequency separately or in hybrid mode to ensure the compatibility of your devices.
Concrete Case: Installing an Outdoor Access Point
If you opt for the "Pro" solution (Level 3), here is the procedure to follow. Locate a spot high up on your facade, ideally under a roof overhang for extra protection, although the boxes are waterproof (IP65). The installation angle is important: aim for the heart of the garden. The most complex part will be to pull a shielded Ethernet cable (Cat6 preferably) from your router to this point. Once plugged in, configure this new access point with exactly the same name (SSID) and password as your router. Thus, your smartphone and your robots will switch automatically from the indoor antenna to the outdoor antenna without interruption, in a completely transparent manner.
Conclusion
Do not let a bad connection spoil your connected garden experience. If you have a small garden, optimize or switch to Mesh. If you have a park, pull a cable and install an outdoor antenna. The peace of mind of a robot always reachable is well worth this initial effort.
Related Articles

Should You Optimize a Small 300m² Garden with a Robot Mower?
Is it worth buying a robot for a small area? ROI calculation and test of the Worx Landroid S300.

RTK, Vision, or LiDAR: Which Wireless Mower Technology to Choose in 2025?
No more boundary wire. But which technology to pick? GPS, Camera, or Laser? The ultimate guide.

Which Robot Mower for Steep Slopes (>45%)?
Does your garden climb like a ski slope? Discover the 4WD robots capable of conquering gravity.